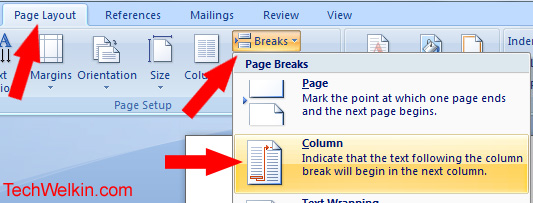
But one of my readers asked if it was possible to keep one column shorter in length and move content into the next column? As per the normal behavior of columns in MS-Word, you have to fill the first column with content before moving into the next column. MS-Word users sometimes, however, want to only partially fill the first column and then move into the next one. Let’s learn how we can accomplish this. SEE ALSO: More MS-Word Tips and Trick STEP 1: Create a new document or open an existing document with columns. STEP 2: Place cursor in the first column from where you want to break the text into the next column STEP 3: Go to Page Layout tab STEP 4: In Page Setup group of buttons, there is a button labeled as Breaks… click on this button STEP 5: A menu will pop-up with various break options. Select Column from this menu. MS-Word will insert a column break and put the cursor in the next column for you to continue typing in next column. NOTE: If text was already there in the columns, text after the column break will be pushed into the next column Inserting column break gives you blank space for placing items like clip-art, diagrams and photos in rest of the column. This is also good for layouts like writing a synopsis in one column and continue with the main text in the other column. I hope that this tip was of help. Please let me know if you have any questions about this topic. I will be happy to try and answer your query. Thank you for using TechWelkin. Comment * Name * Email * Website
Δ